|
The eyes are one of
the most important features of anime style
characters; they are the most expressive
parts of the face, and are part of what
makes each character different and
recognizable. Thus, it is very important
to be able to draw them correctly. In this
section of the general face tutorial, I
will show you how to draw a variety of
anime style eyes. A lot of other sites
only show you how to draw large female
eyes, without really going over the large
variety of other styles. In this tutorial,
I will cover different types of male and
female anime eyes, plus give you examples
of numerous other styles for you to use to
help you draw your own original
characters, or to refine your style with
existing characters.
|
Male
Eyes
Next we will draw
some male eyes. 
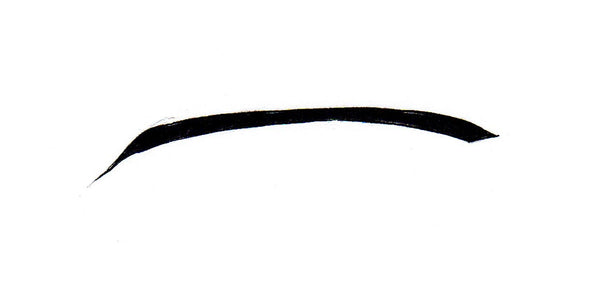
Male characters are
sometimes neglected by fan artists,
because many fan artists have trouble
drawing guys. They really aren't that
hard, though, just different. Most male
eyes are more thin and narrow than female
eyes, though there are several exceptions.
This particular eye (which I think belongs
to Hotohori from Fushigi Yuugi) is
narrower than other female eyes, without
being so thin that it looks like it
belongs to a more shady, suspicious
character. ^_^ Begin by drawing a thick,
very slightly curved line. Its almost
horizontal, but still has a slight curve
to it. The edges should curve inwards a
little, more so on the left.
|
|
Lightly
draw two diagonal lines, starting from the
edges of the top line, to help define the
lower part of the eye. The lines are
almost perpendicular to each other. Don't
make them too steep or too flat, or the
size of the eye will be off. Draw the
lower line of the eye, using the
guidelines to help you position
it.
|
|
Erase
the guidelines and draw the iris. The iris
is a perfect circle, but is paritally
covered up by the eyelids. Do not draw the
iris so small that you can see the entire
thing (unless trying to convey a strong
emotion like surprise or anger, which is
covered in the expressions
section).
|
|
Male
characters have light glares in their
eyes, too, though they often are not as
large or obvious. Draw one oval light
glare on the left side of the eye, and a
pointed one on the right side.
|
|
Draw
the pupil benath the light glares and
shade heavily, especailly if the character
has darker colored eyes. Draw the eyelid
and eyelash. Male characters tend to have
darker, thicker eyebrows, so make sure
they aren't too thin. There, that wasn't
too hard, was it? ^_^ Don't worry if the
eyes look too 'girly'; often times its
hard to tell if some eyes belong male or
female characters. Some styles of eyes are
interchangable and can be used for either
gender.
|
|
Slender,
narrow eyes are often (but not always)
associated with darker, brooding
characters. Villains often have narrower
eyes, but not all characters with such
eyes are antagonistic. To draw this style
of eye, start with a long, curved line.
Notice that the curve is steeper on the
left hand side than the right.
|
|
Next,
draw two diagonal guidelines from the
edges of the top of the eye. The angle of
these lines are different from the ones in
the three previous tutorials; the left one
is much flatter than the the right. Draw
in the lower part of the eye using the
guidelines; it should be curved, rather
than a straight line, so that the entire
eye is like an elongated, pointy
oval.
|
|
Erase
the guidelines and draw the iris. The iris
is covered up by the upper eyelid; if the
eyelids weren't there, the iris would be a
perfect circle. Thicken the lines on the
right side of the eye.
|
|
Draw
in the light glares, as well as the upper
eyelid on top of the eye.
|
|
Finish
up the eye by adding the pupil and shading
the iris, and adding the eyebrow. Smooth
and darken your lines, and you're done.
^_^
|
|
Here
is a collection of male eyes. Notice that
some could be mistaken for female eyes;
the difference between the two genders
isn't always that distinct, especially in
young children. Most of the eyes here are
narrower than the female eyes, and the
tops of their eyes aren't as thick. Male
characters don't always have light glares
on their eyes, but I tend to draw them in
anyway. ;)
|
|
Once
you have the right eye drawn, you're
probably going to want to draw the left
eye, too. ^_^ All you have to do is draw
the mirror image of the exact same eye.
The placement of the second eye can be
tricky, though. Anime eyes, no matter what
style, are always drawn about one eye
length apart. The distance may be a little
more or less, but one eye length is a good
measurement.
|
|
You
probably are not always going to draw your
characters facing towards you, though, so
you'll need to know how to line up eyes at
different angles. On the head
portion of this general face tutorial, you
will see that I use curved guidelines to
define where I'm going to place the eyes.
Always draw guidelines to help you
position the eyes, until you are really
good at it and no longer need them. You
don't want the eyes to be off-center.
Notice that in this picture, the right eye
is smaller and flatter than the left since
it's further away from you.
|
|
This
is pretty much the same thing, except the
head is tilted in the other direction. In
this picture, the left eye is smaller than
the right. Both eyes still follow the
curve of the face. Eyes that don't line up
properly can look very sloppy, so be
careful.
|
|
On to the Next Section!
RETURN
TO MAIN
|